Pick Which Walls Set Slope Roof Revit

Wall By Face Part 2 Creating A Slanted Wall Tool Wall Create Face

Revit Roof Basics 10 Slope Arrow Cadclips Youtube

How To Create A Thatch Roof In Revit Micrographics Thatched Roof Thatch Roof

Revit Tutorials Roofs Youtube

Revit Roof Edits Increasing The Overhang Revit Architecture Autodesk Revit Roof

Roof Diseno De Teja Courtain Wall Part 2 Roof Tiles Roofing Roof

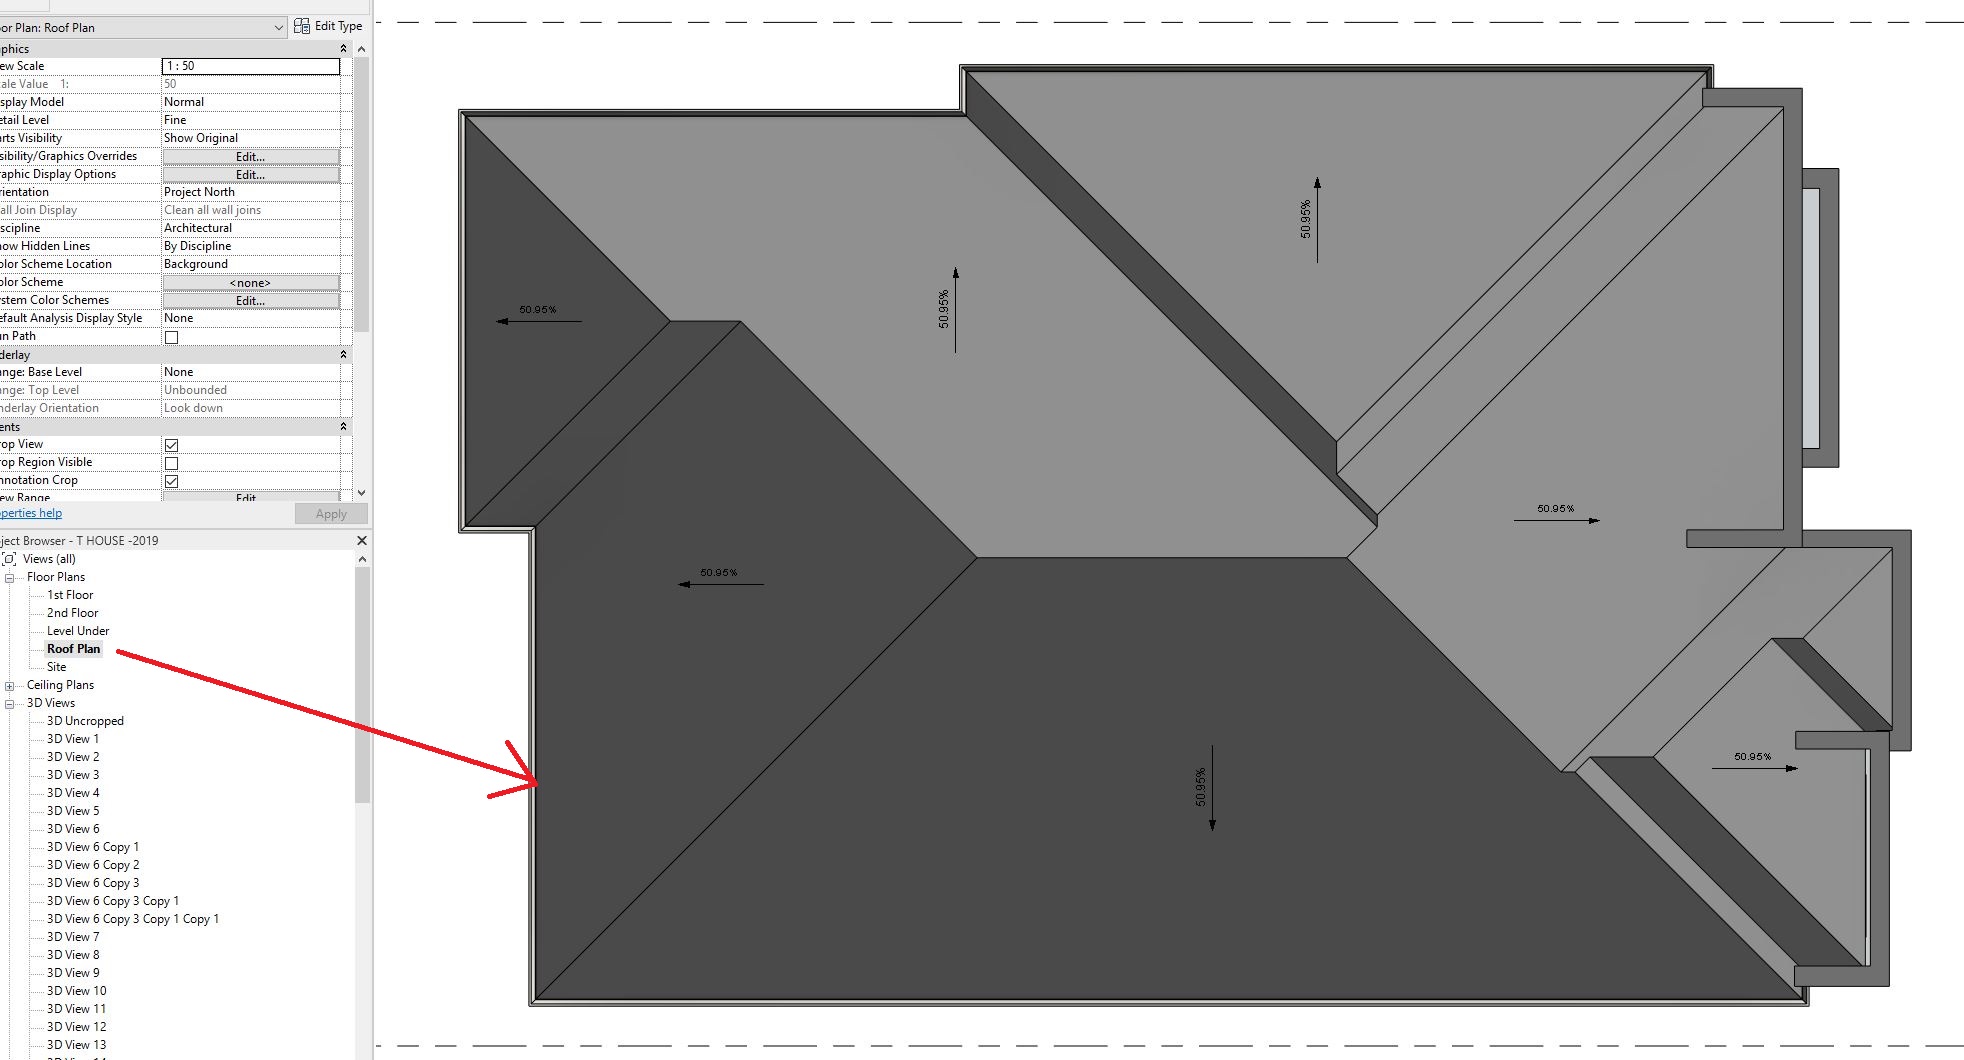
Create a sloped roof in revit step 1 draw your roof step 2 define the slope.
Pick which walls set slope roof revit.

Attaching Walls To Roofs

Roof Truss Systems Roof Trusses Roof Truss Design Truss Structure

Https Encrypted Tbn0 Gstatic Com Images Q Tbn 3aand9gcrxs6ugd7r4lknf5wj0cbyrvk4k5xssern52g Usqp Cau

3 Benefits Of Using Revit View Filters Cadnotes Filters Doors And Floors Views

Trim Interscting Roofs Autodesk Community Revit Products

Intro To Massing And Curved Curtain Wall Systems In Autodesk Revit 2014 Wall Systems Homemade Curtains Luxury Curtains

Revit To Indesign Indesign Bim Image
Roof View Range Autodesk Community Revit Products

Revit Sloped Beam System Cadclip Youtube

Revit Create Slanted Walls The Easy Way Youtube

Modeling A Tensile Fabric Roof In Revit Building Information Modeling Revit Architecture Architecture Program

Tutorial Conceptual Massing And Revit Structure 2014 Conceptual Tutorial Illuminati

Unable To Get Proper Room Volume With Sloped Roof Autodesk Community Revit Products

Pin De Lentigginka Em Revit Em 2020 Revit

Creating An In Place Mass Wall Workout Revit Family Create

Solved Roof Structure Autodesk Community Revit Products

Autodesk Revit Tutorials 05 Adding The Roof Revit Tutorial Autodesk Revit Tutorial

Revit 1 7 Roofs Hip Gable Dormer Revit Tutorial Revit Tutorial Dormers Ceiling Plan
Https Encrypted Tbn0 Gstatic Com Images Q Tbn 3aand9gcqt Jag1pa Hofhz 59fqg8i0feamtfelr0xlmsrdq6chiqvxbg Usqp Cau

How To Modify The Side Contour Of A Wall Architecture Program New Surface Roof Beam

Revit 2d Details Part 3 Organising And Reusing Details Organization Autocad Revit Autodesk Revit

Youtube Wall Cladding Cladding Revit Architecture

Revit Corrugated Sheeting

Autodesk Revit Sloping Curved Walls Youtube
Source : pinterest.com
